
BLDC motor manufacturers need low loss, stable torque, quiet operation, and repeatable dimensions. These results depend on electrical steel laminations, progressive die stamping, and stator and rotor core assembly. A small burr, incorrect stack height, or loose lamination can reduce motor efficiency and increase noise. This guide explains the complete BLDC motor stator and rotor core manufacturing process, from material selection to final inspection.
For overseas buyers and distributors, the key question is not only whether a supplier can stamp steel. The supplier must control tooling, burr height, interlocking, stacking pressure, balancing, and delivery consistency. Onlink supports motor core production with process control designed for small, medium, and high-volume BLDC motor applications.
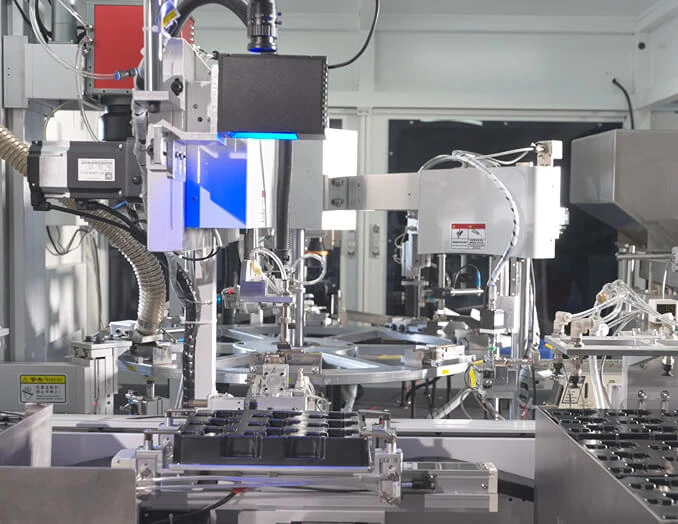
1. Quick Answer: What Is the BLDC Motor Core Manufacturing Process?
A BLDC motor stator and rotor core is made from many thin electrical steel laminations. The laminations are stamped from a steel strip, inspected, stacked to a specified height, fixed by welding, bonding, riveting, or interlocking, and then assembled with other motor parts.
- Confirm the motor drawing and performance requirements.
- Select electrical steel grade and lamination thickness.
- Design and test the stamping die.
- Stamp stator and rotor laminations.
- Inspect dimensions, burrs, slots, and surface quality.
- Stack and secure the stator and rotor cores.
- Balance the rotor and check the final core dimensions.
- Release parts with inspection records and packaging protection.
Key manufacturing conclusion
The best motor core is not produced by stamping speed alone. It is produced by matching steel grade, die accuracy, press control, stacking method, and inspection data. For many precision applications, controlling critical dimensions within about 0.01 mm to 0.05 mm may be necessary, depending on the motor design and tolerance plan.
2. Why Stator and Rotor Core Quality Matters
The stator creates the rotating magnetic field through its copper windings. The rotor follows this field through permanent magnets or another rotor structure. Both parts use electrical steel to guide magnetic flux while limiting eddy current loss.
Poor core quality can create several customer problems. High iron loss may increase temperature. Uneven stator slots can make winding difficult. A rotor that is not concentric can cause vibration. Excessive burrs can damage insulation or create short circuits between laminations.
| Core problem | Possible motor effect | Manufacturing control |
|---|---|---|
| High burr height | Electrical shorting and increased loss | Sharp die edges, correct clearance, burr inspection |
| Incorrect slot size | Winding difficulty and lower copper fill | Tooling measurement and first-piece approval |
| Uneven stack height | Magnetic imbalance and assembly problems | Stacking pressure and height measurement |
| Rotor eccentricity | Noise, vibration, and air-gap variation | Concentricity inspection and dynamic balancing |
| Damaged coating | Higher eddy current loss | Material protection and controlled stamping |
3. Material Selection for BLDC Motor Laminations
Most BLDC motor cores use non-oriented electrical steel. This material provides a practical balance between magnetic performance, strength, cost, and stamping performance. Common lamination thicknesses include 0.20 mm, 0.25 mm, 0.30 mm, and 0.35 mm.
Thinner laminations can reduce eddy current loss, especially at higher operating speeds. However, thinner steel may require more careful die design and handling. The correct material depends on motor speed, power, frequency, temperature, target efficiency, and purchasing budget.
Information buyers should provide
- Electrical steel grade or required magnetic performance
- Material thickness and coating requirement
- Stator outside diameter and inside diameter
- Rotor diameter, shaft hole, and magnet area
- Number of slots and poles
- Required stack height and tolerance
- Annual quantity and forecast schedule
- Surface treatment, packaging, and inspection requirements
If the customer has only a motor sample, a supplier can often begin with reverse engineering and dimensional inspection. Final material selection should still be confirmed through the motor designer or a performance test.
4. Progressive Die Design and Stamping
Progressive stamping uses a strip of electrical steel that moves through several die stations. Each station performs a cutting or forming action. The finished stator or rotor lamination leaves the die after a controlled number of strokes.
The die must control the slot shape, pole geometry, center hole, keyway, ventilation holes, and outer profile. A well-designed progressive die can combine high output with consistent dimensions. The tool also needs a maintenance plan because wear changes the cutting clearance and increases burrs.
Coil loading - Straightening - Pilot positioning - Outer profile or inner profile punching - Slot punching - Rotor or stator separation - Part collection - Inspection
Important stamping controls
Die clearance: Correct clearance produces a clean shear zone and limits fracture. The suitable value depends on steel thickness and grade.
Press stability: Press tonnage, stroke, speed, and feeding accuracy must remain stable. A high-speed press is useful only when the die and feeding system can maintain accuracy.
Strip utilization: Efficient nesting reduces scrap and material cost. However, the layout must not weaken narrow teeth or create excessive deformation near the part edge.
Burr direction: Burrs should be controlled and managed during stacking. In some designs, alternating the burr direction can reduce the effect on total stack height.
5. Stator Lamination Manufacturing and Stacking
A stator lamination contains slots for the copper winding and a yoke that carries magnetic flux. The slot opening, tooth width, inner diameter, and outer diameter directly affect winding space and motor performance.
After stamping, laminations are stacked to a specified height. The stack may be fixed by self-interlocking, welding, riveting, adhesive bonding, or a combination of methods. The selection depends on motor size, production volume, thermal requirements, and customer design.
| Stacking method | Main advantage | Points to check |
|---|---|---|
| Self-interlocking | Fast production and low additional material cost | Interlock strength, flatness, and magnetic impact |
| Welding | Strong and stable core structure | Weld position, heat effect, and distortion |
| Riveting | Reliable mechanical fixing | Rivet location, hole accuracy, and added weight |
| Bonding | Low vibration and limited electrical bridging | Adhesive coverage, curing time, and temperature resistance |
Stator assembly sequence
The final stator core should have a smooth inner bore and stable slot shape. If the stack is tilted or compressed unevenly, the air gap may change after winding and housing insertion.
6. Rotor Lamination Manufacturing and Assembly
The rotor core is stamped with a shaft hole, magnet pockets, ventilation features, or other geometry required by the BLDC motor design. The rotor profile must remain symmetrical because even a small mass difference can create vibration at high speed.
Rotor laminations may be stacked with interlocking points, bonding, riveting, or compression. After stacking, the rotor may receive a shaft, permanent magnets, end plates, balancing weights, or a protective sleeve.
Rotor assembly sequence
For permanent magnet rotors, magnet polarity and position must be controlled. Incorrect polarity can reduce torque or prevent correct motor rotation. Magnet bonding must also withstand centrifugal force, operating temperature, and vibration.
7. Inspection Standards and Useful Production Data
A professional motor core supplier should use both process inspection and final inspection. Measuring only the finished part may not show the reason for a problem. Recording die condition, material batch, press settings, and stack results makes quality issues easier to solve.
| Inspection item | Typical purpose | Recommended record |
|---|---|---|
| Outer and inner diameter | Confirm housing fit and air-gap geometry | Measured value and tolerance result |
| Slot width and position | Confirm winding fit and magnetic symmetry | Coordinate or gauge inspection |
| Burr height | Reduce shorting and stacking error | Microscope or burr gauge result |
| Stack height | Confirm magnetic length | Height, pressure, and flatness data |
| Concentricity | Control rotor and stator air gap | Runout or coordinate measurement |
| Rotor balance | Reduce vibration and noise | Balancing grade and correction record |
Sampling and full inspection
High-volume production often uses first-piece approval, patrol inspection, and scheduled sampling. Critical dimensions may need 100 percent inspection when the motor has a narrow air gap, high speed, or strict vibration limit. The inspection plan should be agreed before mass production.
8. Common BLDC Motor Core Problems and Solutions
Problem: High burrs after stamping. Common causes include die wear, incorrect clearance, poor alignment, or unsuitable press settings. The solution is to inspect the cutting edge, adjust the die, reduce vibration, and confirm the material thickness.
Problem: Stack height changes between batches. This may result from different material thickness, inconsistent pressure, interlock variation, or mixed laminations. Use one approved material source and record the compression method for each batch.
Problem: Rotor vibration after assembly. Check shaft runout, lamination alignment, magnet weight, adhesive distribution, and dynamic balance. Rotor correction should be completed before the part is shipped.
Problem: Winding does not fit the stator slots. Review slot dimensions, burrs, coating damage, and the winding method. A small change in slot opening can affect both automatic winding and copper fill.
9. How to Select a BLDC Motor Core Manufacturer
A suitable supplier should provide more than a low stamping price. Buyers should review the supplier's die design ability, steel purchasing system, press capacity, stacking equipment, inspection tools, and experience with export packaging.
- Ask for a drawing review before quotation.
- Confirm material grade, thickness, and coating.
- Request a tooling plan and expected die life.
- Check sample dimensions and burr results.
- Confirm the stacking and fixing method.
- Define inspection frequency and approval criteria.
- Review production capacity against annual demand.
- Confirm packaging that prevents rust, bending, and mixing.
Onlink works with customers to review motor core drawings, recommend practical manufacturing methods, and organize inspection data for repeat orders. This approach helps distributors reduce quality claims and helps motor manufacturers shorten the time from prototype to stable production.
10. FAQ About BLDC Stator and Rotor Core Manufacturing
What material is used for a BLDC motor core?
Non-oriented electrical steel is the most common choice. The thickness and grade depend on motor speed, frequency, efficiency target, temperature, and cost requirements.
What is the difference between a stator core and a rotor core?
The stator core is fixed and contains slots for windings. The rotor core rotates inside the stator and normally contains a shaft hole and permanent magnet structure.
Which stacking method is best?
There is no single best method. Interlocking is efficient for high-volume production, while welding, riveting, or bonding may be better when the design needs stronger fixing, lower vibration, or controlled electrical separation.
How can motor core burrs be reduced?
Use the correct die clearance, maintain sharp cutting edges, control press alignment, select suitable electrical steel, and inspect burr height during production.
Why is rotor balancing necessary?
A rotor with uneven mass can create vibration and noise as speed increases. Dynamic balancing improves running stability and reduces stress on bearings and the motor housing.
11. Final Checklist for Overseas Buyers
Before placing a production order, confirm the drawing revision, steel grade, lamination thickness, tolerance range, burr limit, stack height, fixing method, inspection plan, quantity, lead time, and packaging standard.
Reliable BLDC motor stator and rotor core manufacturing is a controlled chain: material, tooling, stamping, inspection, stacking, assembly, and balancing. When every step is connected by clear data, buyers receive cores that support stable winding, accurate air gaps, lower motor loss, and repeatable mass production.


